To drape content on 3D Tiles, you need to:
-
Configure a
TileSet3DLayerwith anOGC3DTilesModelfor draping. The meshes inside such a draping-readyTileSet3DLayerbecome drape targets. -
Set up draping content, such as a
RasterLayeror aFeatureLayer, for draping on 3D Tiles mesh data.
Configuring a TileSet3DLayer for draping
To set up a mesh in a 3D TileSet layer for draping, set the isDrapeTarget setting on the TileSet3DLayer to true,
as illustrated in Program: Configuring your 3D TileSet layer for draped content.
const ogc3dTilesLayer = new TileSet3DLayer(model, {
  isDrapeTarget: true
});
This means that the 3D Tiles mesh data in the layer can now receive content that you set up for draping.
Setting up the draping content
Select the drape targets for draping content
To drape content on a 3D Tiles mesh, you must specify an appropriate DrapeTarget for the draped content.
Your options are:
-
TERRAIN: drapes the content on terrain only.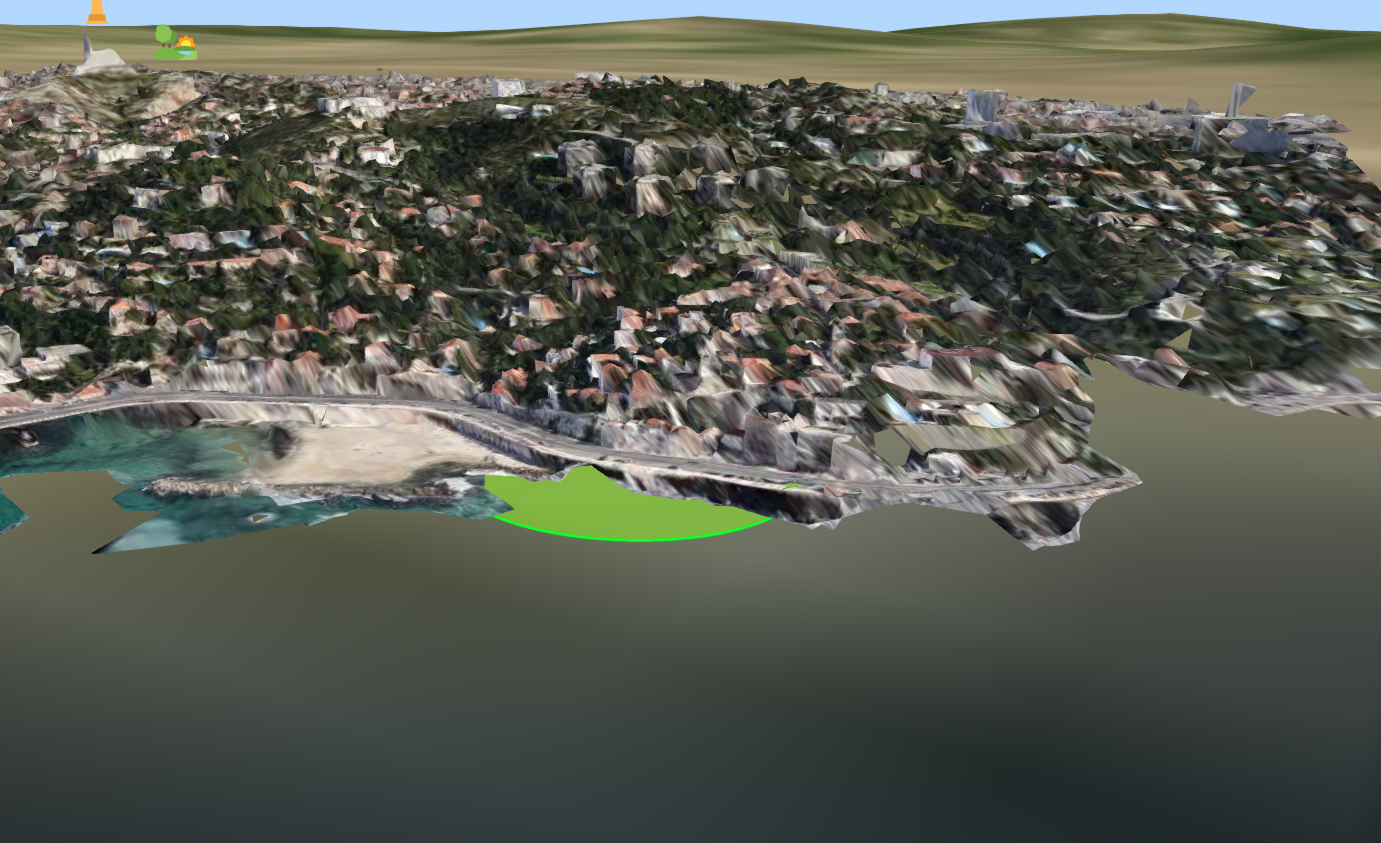 Figure 1. Shape draped with
DrapeTarget.TERRAIN -
MESH: drapes content only on meshes that are drape targets.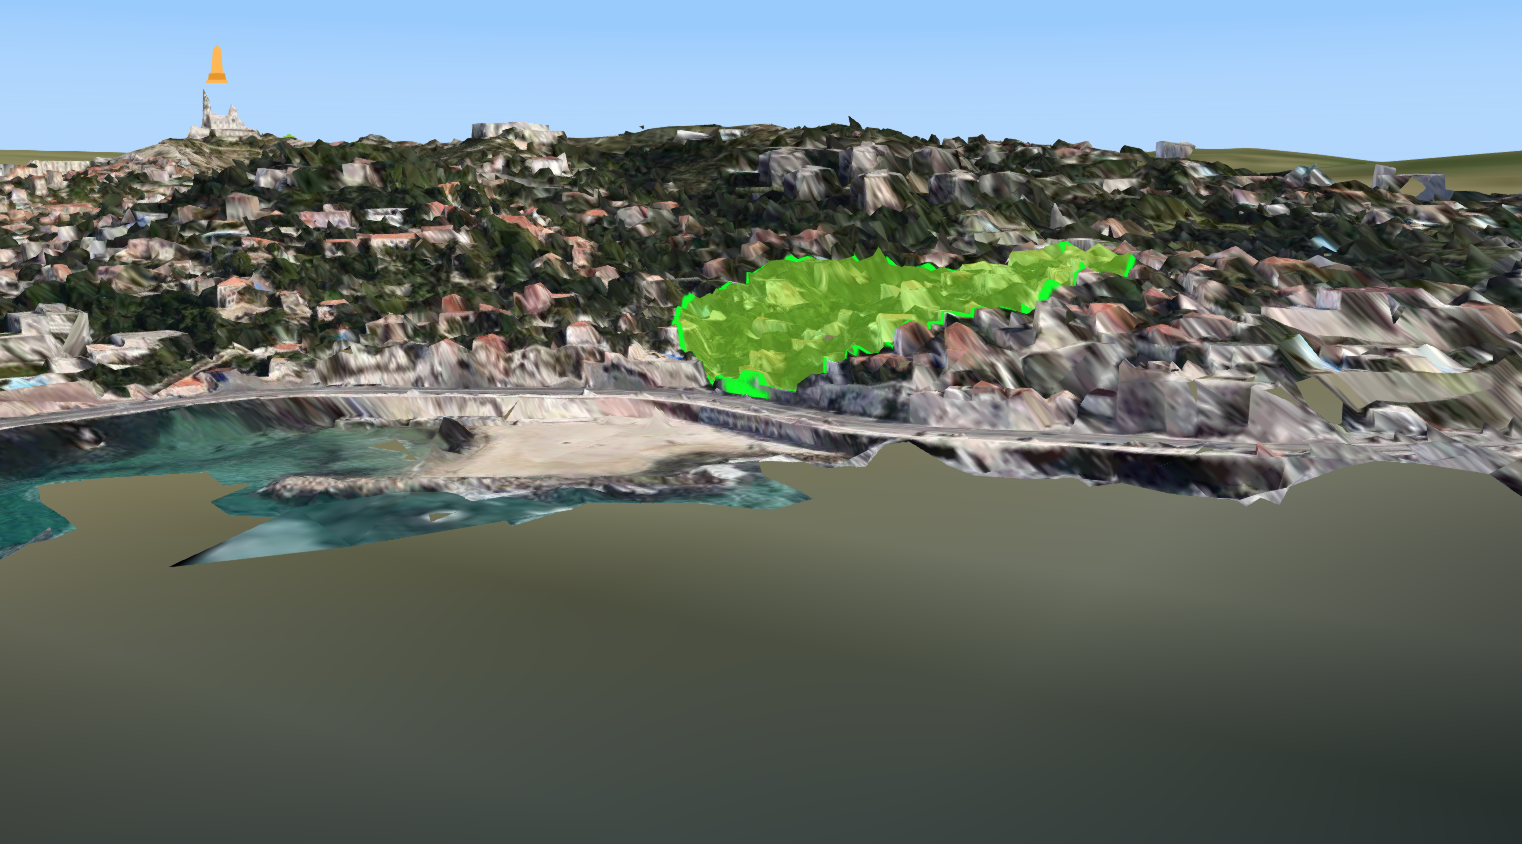 Figure 2. Shape draped with
DrapeTarget.MESH -
ALL: combines the draping effect ofTERRAINandMESH.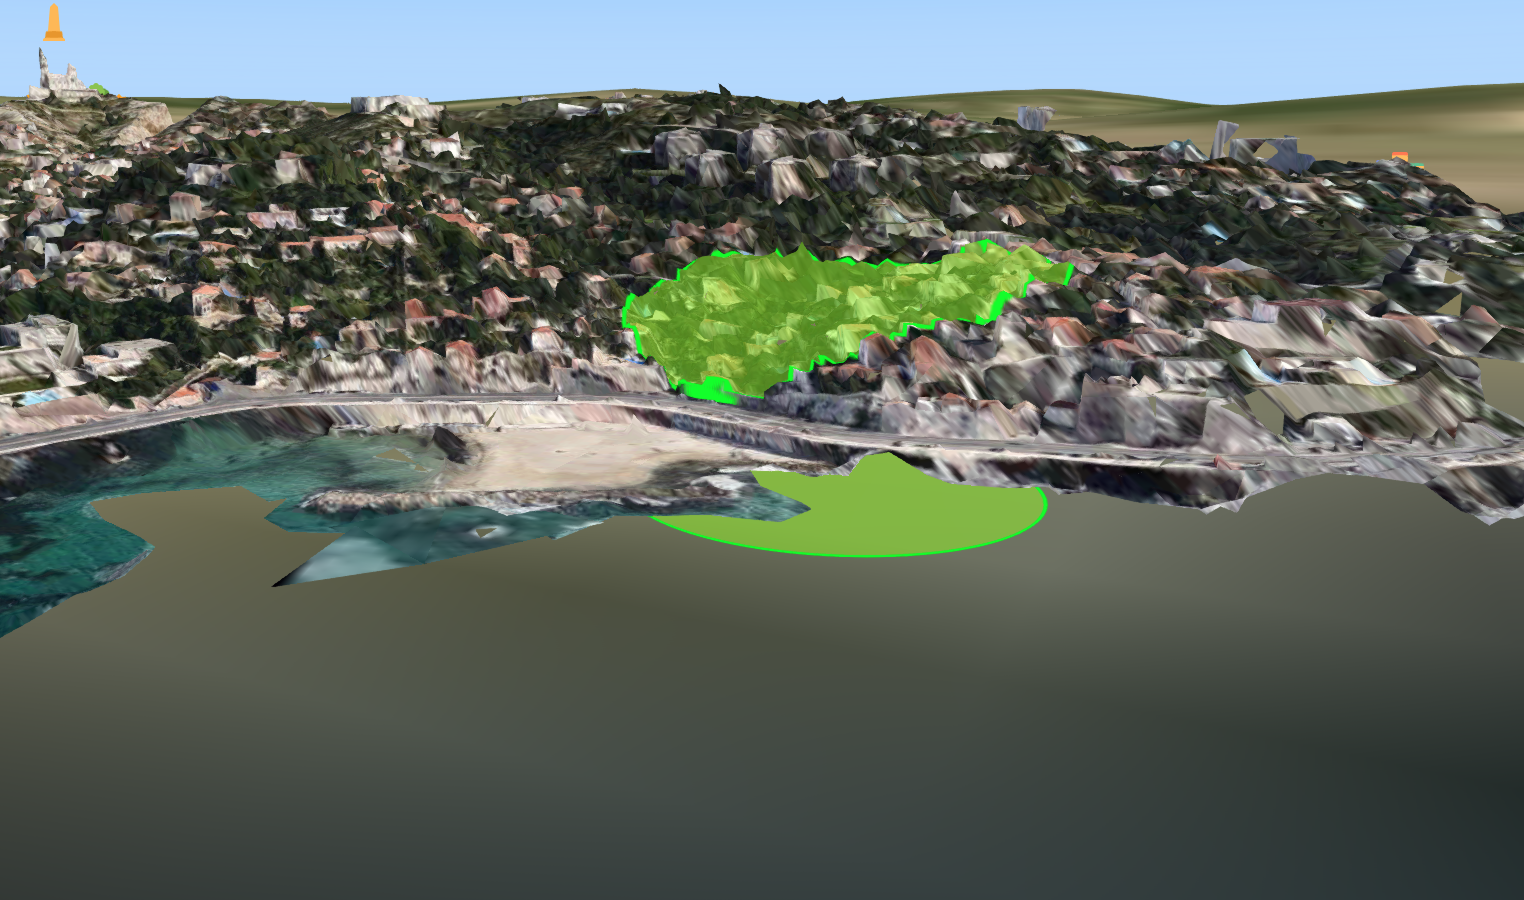 Figure 3. Shape draped with
DrapeTarget.ALL -
NOT_DRAPED: doesn’t drape the content.
|
You can also assign a boolean value to |
While you’re working with draping on 3D Tiles, you might notice stretched textures on near-vertical slopes of your mesh.
To prevent such a stretch effect, you can limit the slope of the mesh to a draping range using TileSet3DLayer.drapeSlopeAngle.
LuciadRIA then only drapes content on slopes with an angle between 0° and the angle you have set.
drapeSlopeAngle
drapeSlopeAngle set to 60°
Set the drape targets for draping content
Drape vector data on 3D Tiles
When you’re creating your own FeaturePainter, you must use a style with the drapeTarget property.
LuciadRIA passes that style to the GeoCanvas draw call in your FeaturePainter.paintBody method.
Drape shapes and icons
To drape icons and shapes, set the drapeTarget property of their corresponding style to the desired DrapeTarget. These properties are IconStyle.drapeTarget and ShapeStyle.drapeTarget. Program: Draping a shape on 3D Tiles mesh data illustrates this for a ShapeStyle.
const painter = new FeaturePainter();

painter.paintBody = function(geocanvas, feature, shape, layer, map, paintState) {
  geocanvas.drawShape(shape, {
    stroke: {
      color: "rgb(255, 164, 0)"
    },
    drapeTarget: DrapeTarget.MESH
  });
};
See Visualizing lines and areas in 3D using draping for more information.
Drape KML data
KML data can contain features that need to be draped. To specify the target for draping these features,
you can use the drapeTarget property when you’re creating a KMLLayer. This example illustrates the creation of a KML layer in which draped content is draped both on terrain and 3D Tiles mesh
data:
const layer = new KMLLayer(model, {
  drapeTarget: DrapeTarget.ALL
});
Drape SLD-styled data
To drape data styled with OGC SLD, set the drapeTarget property when you’re creating an SEPainter using SEPainterFactory:
//Use one of the factory methods available in SEPainterFactory to create a painter that drapes the data
const seURL = "http://foo.com/se/CitiesSymbolizer.xml";
createPainterFromURL(seURL, {
  drapeTarget: DrapeTarget.MESH
}).then(function(painter) {
  map.layerTree.addChild(new FeatureLayer(model, {
    painter: painter
  }));
});
Drape military symbols
To drape military symbols, set the MilSymStyle.drapeTarget property when you’re creating a MilitarySymbologyPainter:
const symbologyDrapingPainter = new MilitarySymbologyPainter(MIL_STD_2525b, {
  //This is shorthand for a function that returns feature.properties.code
  codeFunction: "code",
  style: function(feature: Feature): MilSymStyle {
    //We use the default style in combination with a draped property to drape all symbols on 3D tiles mesh data.
    return {
      drapeTarget: DrapeTarget.MESH
    };
  },
});
Drape vector content using other painters
| Painter | Location of the drape option |
|---|---|
|
Style setting with an appropriate |
Drape raster data on 3D Tiles
To drape raster data, set the RasterStyle.drapeTarget property on the style of a raster layer:
rasterLayer.rasterStyle.drapeTarget = DrapeTarget.ALL;|
Due to a technical limitation, you can’t drape the bottom-most |